22 ultimate tips and tricks for mobile night photograpy – part 4 – Tricks for shooting with Camera FV-5
If you are using recommended application Camera FV-5 on phone without full mode support, you will met some obstacles, that makes your night photo shoots a little harder. It could looks impossible to go through on a first sight but don’t worry we will show you some tricks how to do it.
22 ultimate tips and tricks for mobile night photograpy
- Part 1 – Required equipement
- Part 2 – Tricks for night shooting 1-5
- Part 3 – Tricks for night shooting 6-11
- Part 4 – Tricks for shooting with Camera FV-5
- Part 5 – Tips for postprocess
Tricks for shooting with Camera FV-5, when there is no open API for manual mode
During shooting with Camera FV-5 I found, that even I setup minimal ISO, when push trigger there is different ISO in EXIF and other parameters, than what I setup. On my Sony Xperia Z1 Compact is all seting just pseudo-setting. Unfortunately Sony completely locked API for camera and not allow any manual change. After long twiddling I found after all there is a way how tu push phone cooperate even with locked API. It is just a little awkward.
1. How to compel smarthone to use lowest ISO
The only way how to hardly setup lowest ISO is choose in Camera FV-5 mode S / Long+. Only this mode push Sony API information, it should use lowest possible ISO and not allow auto logic to increase this value. Negativ aspect of this mode is impossibility of setting anything else. You cannot setup white balance, EV, measure just nothing. In case you setup it by chance, than Sony API did what? Yes, it resetup it again by its own logic.
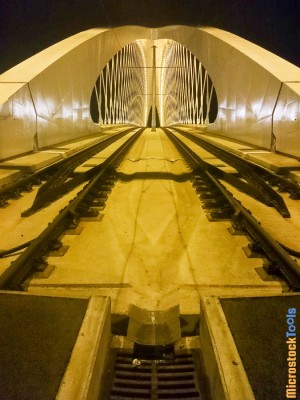
Original ISO 50 phone resetup a little higher. Thats why photo is a quite noisy.
2. How to force white balance change, EV or scene measure in S / Long+ mode
Because in S / Long+ mode you are unable to sets anything (all is locked). Just in Sony Xperia is white balance really trouble as in this mode all colors are moved strongly to red. The only possibility that partially works, is setup mode P/Auto, choose WB and other parameters, switch to mode S / Long+ and quickly shoot. Why quickly? Simply because this setting is reset back in about 2 seconds. Meanwhile you can shoot one or two photos. Than you have to do whole setup procedure, switch, setip … and also forget with this breakneck procedure to self-timer. Well sometimes 2 second self-timer works, sometimes it’s reset again back to auto white balance, in my case to red touch of color.
3. Will be in S / Long+ mode ISO always minimal? Not exactly …
Even Long+ setup in Camera-FV 5 not ensure always lowest ISO. In Long+ is not possible exposure compensation, but if you switch to P mode, setup WB, self-timer and exposure compensation into plus value, switch to S / Long+ mode and will be quick enough your setting of WB and self-timer will be hold for a while, but exposure compensation causes increase ISO value even in this mode. See example with name „spaceport“, which is shoot with ISO 100, even though I used Long+ mode. Reason was the exposure compensation, which I need to use to see more than just light points, because scene was too dark.
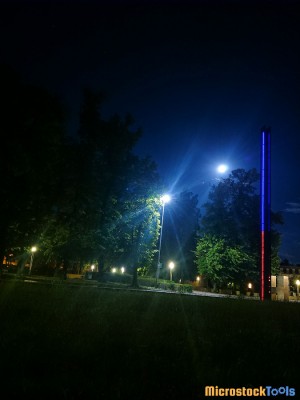
Spaceport – exposure compensation increase ISO to value 100 even though it was used Long+ mode
4. Any long time has one big BUT
Camera FV-5 can shoot in special longer mode for capture 1, 2, 5 or even how many second you setup. This works also for phones without support new API. Great … but oh. Here is used tricky. It’s not actually shoot as photo, but recording video and than app get some frames from video and crossfade them together into scene, which creates you final photo. You can expect these negatives:
- Instead of continuos lines are moving objects shown like thay jump. On the other side you can use it quite creative way.
- Picture size corresnponds to video size. For example if you have FullHD support, your photo in this mode will be 1920 x 1080 (quite difference when my camera has normaly 20 Mpix)
- Forget about ISO control. You will record and phone sets the rules. So in the night probably on ISO 3200. Advantage is, that crossfade will remove quite a lot noise. But do not expect miracles.
- Final picture wouldn’t be sharp enough. Drawing quality will be lost as well.
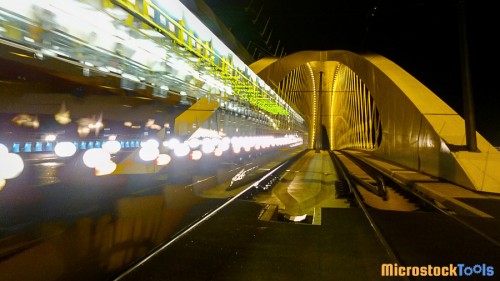
Instead of continuos lines is by crossfade tram passage painted as chopped image.
All chapters of ultimate night photography guide
- Part 1 – Required equipement
- Part 2 – Tricks for night shooting 1-5
- Part 3 – Tricks for night shooting 6-11
- Part 4 – Tricks for shooting with Camera FV-5
- Part 5 – Tips for postprocess

